Hello, dear crafters! Are you ready to embark on a creative journey that will result in a stunning piece of jewelry? Today, I’m thrilled to share with you a step-by-step guide on how to make your very own Embroidered Necklace. With just a few materials and a touch of imagination, you’ll be able to create a wearable work of art that reflects your unique style and personality. So, let’s dive in and unleash our creativity!
Contents
- 1 Materials You’ll Need:
- 2 Step 1: Choose Your Design
- 3 Step 2: Prepare Your Fabric
- 4 Step 3: Stitch Your Design
- 5 Step 4: Finishing Touches
- 6 Step 5: Assemble Your Necklace
- 7 Step 6: Admire Your Creation
- 7.0.0.1 The Ultimate Guide to Designing Your Own T-Shirts
- 7.0.0.2 Designing Your Brand’s Identity: A Blueprint For Logo Creation
- 7.0.0.3 5 Delicate Fonts For Your Wedding Invitations
- 7.0.0.4 6 Handwriting Fonts For Creative Projects
- 7.0.0.5 Boost Your Drawing Skills With 4 Tips
- 7.0.0.6 A Clear Guide To Making Embroidered Necklaces
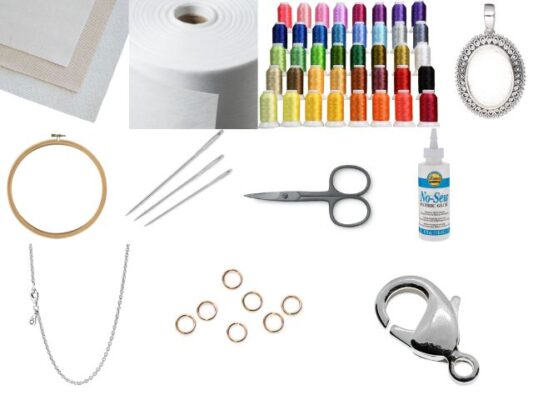
Materials You’ll Need:
- Base fabric (felt or linen are excellent choices)
- Iron-on interfacing
- Embroidery threads in various colors
- Pendant bezel setting
- Embroidery hoop
- Embroidery needles
- Scissors
- Fabric glue
- Chain or cord
- Jump rings
- Clasp
Step 1: Choose Your Design
Begin by selecting a design for your pendant. Whether it’s a floral motif, a geometric pattern, or a personalized monogram, let your creativity flow! Sketch your design onto the base fabric using a pencil or fabric marker, ensuring it fits within the dimensions of your pendant bezel.
Step 2: Prepare Your Fabric
Layer your base fabric with iron-on interfacing to add stability and structure. Place the fabric in an embroidery hoop to keep it taut and secure while you work. This will help prevent puckering and ensure smooth stitching.
Step 3: Stitch Your Design
Thread your embroidery needle with your chosen colors and start stitching your design onto the fabric. Experiment with different stitches and techniques to add depth and texture to your necklace. Take your time and enjoy the process of embroidery—it’s incredibly therapeutic!
Step 4: Finishing Touches
Once you’ve finished stitching your design, carefully remove the fabric from the hoop and trim any excess fabric from the edges. Apply a thin layer of fabric glue to the back of the fabric to secure it in place.
Next, place the embroidered fabric into the pendant bezel setting, ensuring it fits snugly. Use a small amount of fabric glue to secure the fabric to the setting, then allow it to dry completely.
Step 5: Assemble Your Necklace
Thread a chain or cord through the loop on the pendant setting, adjusting the length to your preference. Attach jump rings and a clasp to the ends of the chain to complete your necklace.
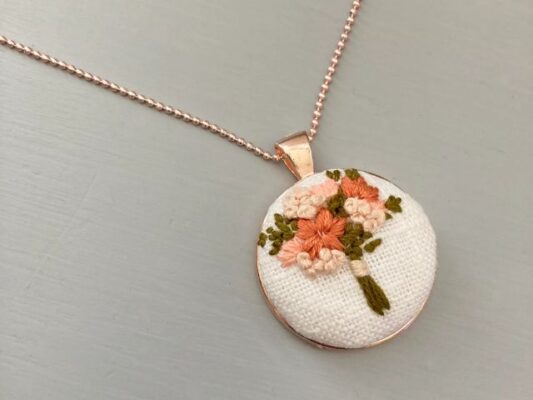
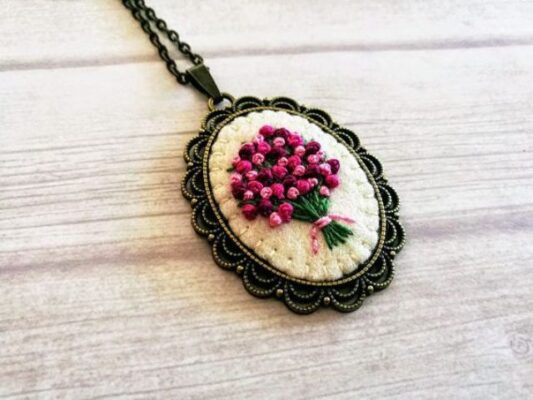
Step 6: Admire Your Creation
Congratulations! You’ve just crafted your very own Embroidered Necklace—a beautiful and unique piece of jewelry that reflects your individuality and creativity. Admire your creation and wear it with pride, knowing that it’s a one-of-a-kind masterpiece made by your own hands.
Thank you for joining me on this crafting adventure! I hope you’ve enjoyed learning how to make your own Embroidered Necklace. Whether you’re making it for yourself or giving it as a gift, I’m sure it will be cherished for years to come. Happy crafting!
Related Posts
- These 5 Fonts Are For Nature Lover
- Let’s Spread NEA’s Read Across America
- Celebrates US As A Nation Of Diverse Readers